

Dielines are vector files and are essentially the flat laying version of your finished packaging.
They usually come blank giving you, or a packaging designer, the exact guidelines for design preparation.
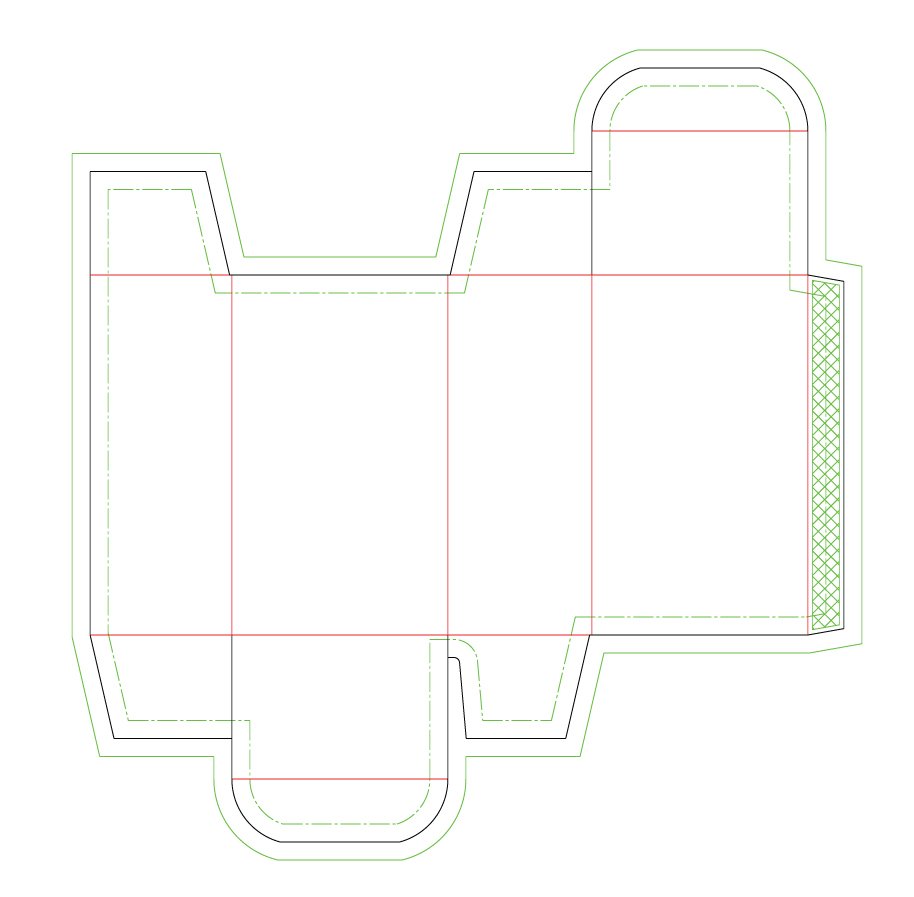
It acts as a guide when making cuts, scores, and indentations in the die-cutting process to construct your packaging.
Cut Lines
Marked in black, cut lines are probably the most crucial part of your die line.
They communicate where your die line should be cut to ultimately construct your packaging thereafter.
Fold Lines
Fold lines are usually marked in red and communicate where your packaging should be folded for construction.
The red dotted lines ensure that your packaging can be constructed with ease.
Bleed Lines
Source: pakfactory.com
Bleed lines are marked in solid green and separate the excess space from the space that will be used by the artwork design.
Bleed lines help prevent any obscuring of your artwork and ensure your packaging design remains the way you planned it on your vector file!
The bleed line is used outside of the cutline to prevent a white border from forming around the design’s edge – a crucial part in ensuring your customers feel as if they are opening a quality product.
Safe Zone
The safe zone is marked as a green dotted line and indicates to the printer which areas are guaranteed to be seen on your custom printed boxes.
This helps printers with alignment and ensuring that printed artwork is placed correctly on the finished project and accounts for any movement of the stock during printing.
Glue Tabs
Your glue tabs will be shown as green criss cross markers to indicate where glue needs to be placed in the construction of your packaging.
Some packaging structures like auto lock bottom boxes do not require a glue tab as they are designed to be constructed without glue or tape.